 Blaine Roofing
 New-Construction Windows for Lynden Homes
When a home in the Lynden area is framed and ready for windows, the install has to get a few things right the first time — because unlike a replacement job, there's no old window and existing flashing to fall back on. New-construction windows go in with a nailing fin, tied directly into the house wrap and flashing system while the wall is still open. Get that sequence wrong and you're not looking at a cosmetic problem down the road — you're looking at water finding its way into the framing where nobody can see it until the drywall is already up.
We install new-construction windows on builds and additions around Blaine and out toward Lynden regularly, and the properties in this area share a common set of conditions: salt-laden air off the water, wind-driven rain that doesn't just fall straight down, and a long stretch of the year where moss and moisture sit on north-facing walls and rooflines longer than most homeowners expect. None of that changes what a window is made of, but it changes how carefully the installation has to be done and what products hold up best long-term.
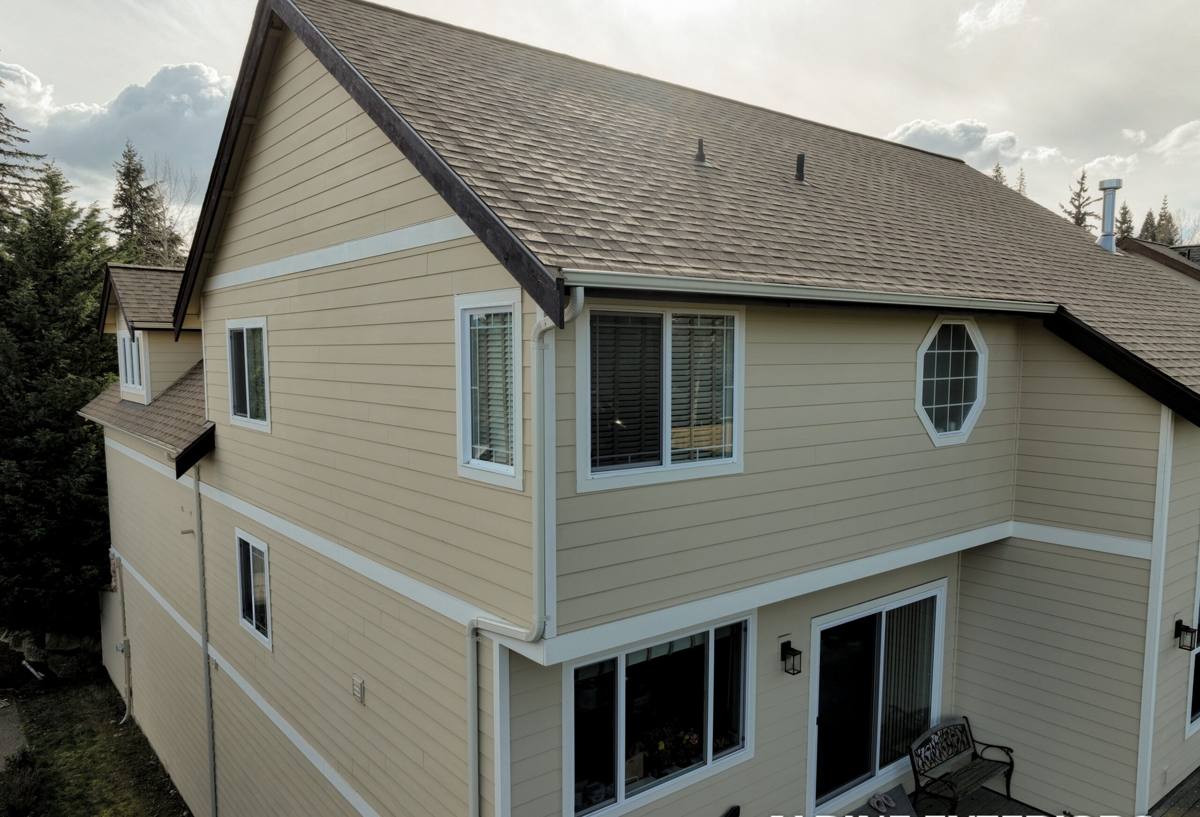
What "New Construction" Actually Means
New-construction windows are built with a nailing flange (fin) around the frame that gets fastened to the sheathing, then integrated into the weather-resistive barrier and flashing before siding goes on. This is different from a replacement or "pocket" window, which is sized to fit inside an existing frame without disturbing the exterior wall.
- New construction: installed during framing, before siding — full access to the rough opening and flashing plane.
- Replacement (insert): fits into an existing frame, keeps the old exterior trim and cladding largely undisturbed.
- Full-frame replacement: removes the old window down to the rough opening, similar exposure to a new-construction install but on an existing wall.
For a true new build or an addition in the Lynden area, new-construction windows are almost always the right call — they give the crew a clean shot at building a proper drainage plane from scratch, which matters a lot given the weather this part of Whatcom County sees.
Why the Local Climate Changes How We Build This
Blaine and the surrounding Whatcom County coastline sit close enough to salt water that airborne salt is a real factor in material selection and hardware longevity — it accelerates corrosion on lower-grade fasteners and hinges over time. Add in driving rain that comes in sideways off storms rather than falling straight down, and the flashing details at the head and sill of every window opening become the difference between a window that stays dry for decades and one that quietly rots the framing behind it.
Then there's moss season. Shaded north and east walls here can stay damp for months at a stretch, especially under eaves with limited sun exposure. That moisture doesn't just sit on the siding — it works into any gap in the water-resistive barrier it can find. A window opening is one of the most common places for that gap to exist if the sill pan, flashing tape, and head flashing weren't installed in the right order.
What this means in practice
It means we don't treat flashing as an afterthought or a quick wrap of tape. Every new-construction opening gets a sloped sill pan, properly lapped side and head flashing, and compatible sealants and tapes — installed in a shingle-style sequence so water is always directed outward and downward, never trapped behind the window.
What a Correct Installation Involves
A new-construction window install has a specific order of operations. Skipping or reordering steps is where most long-term failures start, even when the window itself is a good product.
- Rough opening check: confirm the opening is square, level, and sized correctly with proper clearance — not tight, not oversized.
- Sill pan flashing: a sloped, back-dammed pan so any water that gets past the window drains back outside instead of pooling on the sill.
- Side and head flashing, lapped correctly: installed so upper layers overlap lower layers — the same principle as roof shingles — so water always sheds down and out.
- Window set and secured: shimmed plumb, level, and square, fastened per the manufacturer's schedule (not just "enough nails to hold it").
- Fin sealed and taped: nailing fin fully bedded and taped with a compatible flashing tape — mismatched tape and housewrap chemistry is a real cause of adhesion failure.
- Insulation and air sealing at the gap: low-expansion foam or backer rod and sealant between frame and rough opening, avoiding overfilling that can bow the frame.
- Interior and exterior trim/sealant: final weatherproofing details completed once siding and trim go on around the opening.
Every one of those steps is inspectable while the wall is still open — which is exactly why new construction is the best possible time to get it right. Once siding closes the wall up, the only sign of a mistake is a stain or soft spot that shows up years later.
Choosing Window Materials for This Climate
Frame material matters more here than in a dry inland climate, because everything on the exterior of a Blaine-area home deals with salt air and sustained damp periods. There's no single "best" material for every budget and style — the honest answer depends on what the homeowner is prioritizing.
| Frame Material | Coastal/Moisture Performance | Maintenance | Typical Fit |
|---|---|---|---|
| Vinyl | Good — won't rot or corrode, seals well when installed correctly | Low — occasional cleaning | Most new-construction budgets |
| Fiberglass | Very good — dimensionally stable, handles temperature/moisture swings well | Low | Higher-end builds, larger openings |
| Wood-clad | Good if maintained — the cladding protects the wood, but any breach needs prompt attention | Moderate to high — finish upkeep matters | Design-driven projects, interior wood look |
| Aluminum | Prone to corrosion near salt air unless marine-grade and well-finished | Moderate | Specific architectural styles, not our default recommendation here |
We steer most Lynden-area new construction toward vinyl or fiberglass for the exterior-facing performance, not because other materials are bad products, but because they hold up with the least ongoing maintenance in a climate that's damp more months than it's dry. Glass packages matter too — a good low-E, dual-pane (or triple-pane for north-facing or highly exposed walls) unit cuts down on condensation risk, which is its own moisture problem on cold, wet mornings.
Our Process, Start to Finish
1. Estimate and product selection
We walk the plans or the framed structure, talk through window styles, frame material, and glass packages, and give a straightforward estimate — no pressure, no inflated "today only" pricing.
2. Scheduling around the build sequence
New-construction windows have to go in at the right point in the framing schedule — after sheathing and house wrap, before siding. We coordinate with the builder or homeowner so the install doesn't hold up the rest of the project.
3. Installation
Our crew follows the flashing and sealing sequence outlined above on every opening, not just the ones that are easy to reach. Openings on exposed, weather-facing walls get the same care as sheltered ones.
4. Walkthrough
Before we consider the job done, we check operation on every window — smooth opening, tight seal, correct locking — and walk the exterior with the homeowner or builder to confirm the flashing and trim details.
Mistakes We See From Rushed Installs
Most window problems we get called out to inspect in this area trace back to a handful of preventable issues:
- Flashing installed in the wrong order (head flashing under the side flashing instead of over it), which lets water in instead of shedding it out.
- No sill pan, or a flat sill pan without a back dam, so water has nowhere to go but into the framing.
- Incompatible tape and house wrap combinations that fail to bond long-term.
- Over-fastening or under-shimming, which can bow frames and break the seal on sashes over time.
- Gaps left unsealed at the interior, letting humid indoor air condense inside the wall cavity.
Every one of these is a sequencing or attention-to-detail issue, not a product defect — which is exactly why the installer matters as much as the window brand.
Homeowner Maintenance Checklist
Even a correctly installed window benefits from basic upkeep, especially given the moss and moisture season here:
- Rinse salt residue and grime off exterior frames a couple times a year, especially on walls facing open water or prevailing wind.
- Check exterior caulking and trim seals annually for cracking or gaps, and address small failures before they become active leaks.
- Keep gutters and downspouts clear so water isn't sheeting down over window heads during heavy rain.
- Watch for moss or algae buildup on sills and trim on shaded walls, and clean it off before it holds moisture against the frame.
- Operate every window at least a few times a year — sashes that never move can develop stuck seals or hardware issues that go unnoticed.
Why a Blaine-Based Crew That Knows Lynden Matters
Window installation isn't complicated in theory, but it's unforgiving in practice — one skipped flashing step doesn't show up as a problem for months or years, by which point it's a repair instead of a five-minute correction. A crew that works this specific stretch of Whatcom County regularly has already seen how salt air, driving rain, and long damp seasons affect installs here, and builds accordingly instead of treating every job like it's in a dry, inland climate.
We're based in Blaine and take on new-construction window work in the Lynden area as part of our regular service territory — not as an occasional trip out. That means we know what these builds need before we show up, and we're a known, reachable local business afterward if a question comes up.
If you've got a new build or addition going up in the Lynden area and windows are coming up in the schedule, we're glad to walk the plans with you and put together a free, no-pressure estimate.